Project Getting Started
The goal of this page is to help people with data to get it into the Riverscapes Data Exchange. This page is intended for people who are new to the Riverscapes Data Exchange and have data that they would like to share with the community.
The instructions below cover several important steps, not all of which may be necessary for every situation. See the links on the right to jump ahead to a specific section.
Getting data into the Riverscapes Data Exchange requires consideration of several components. The data itself are bundled as a project, along with an XML project file (*.rs.xml). For a project to be accepted into the Data Exchange, it must be one of the defined project types, and so new types of data need this project type definition to be specified first. Finally, business logic and symbology files are used to determine how the data are displayed in the Riverscapes Viewers, and these also need to be developed for new project types.
Project Type Definition
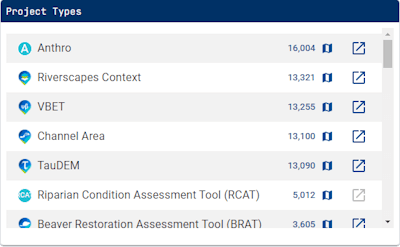
Is the type of project that you are working on already defined in the Riverscapes Data Exchange? If it is then you can skip ahead to the next section. If not, you may need to create a new project type. If you are unsure, check the list of existing project types on the Data Exchange home page.
Defining a New Project Type
First, consider the data that you are trying to define. Think broadly and deeply about whether this is a one-off dataset, or whether you or other users will continue to use this project type into the future. Thinking ahead will increase the utility of your project type and reduce the amount of work that you need to do in the future.
If you are creating a new project type, you will need to define the following:
- machineName - This is a short, unique identifier for the project type. It should be less than 20 characters long and must not include spaces or special characters. It's best, but not required, to be all lowercase. This identifier will be used in the
project.rs.xmlfile for every project of this type. - Name - A short name for the project type. It's best if this name is less than 50 characters long. It can include spaces, but try to avoid special characters. Review the existing names and choose something unique.
- Summary - A brief description of the project type. This should be less than 200 characters long.
- Website - Link to an external documentation web site or a place where users can find more information about the project type.
- Description - A longer, plain text, description that can include information about the data included in projects of this type, as well as the purpose of the project type, and any other information that you think is relevant. Markdown syntax is supported in the description.
Once you have determined the values for these fields, contact an administrator for the Data Exchange to create the project type for you.
Data Preparation
If your data are for an existing project type, then the easiest way to prepare a new dataset is to visit the Riverscapes Data Exchange, download an existing project of the same type and then replicate the same folder and file structure in your new dataset.
If you are creating a new project type, you will need to prepare your data by organizing your files into a practical folder structure. This is an inherently bespoke process that will depend on the data that you have and the project type that you are creating. However, there are some general guidelines that you can follow:
- Folder structure - organize your data into logical, convenient folders that will make it easier for you to find and use your data in the future. For simulation models, we typically use the folders
inputs,intermediatesandoutputs. But for one-off, static datasets you might choose something more thematic. Avoid creating folders with only one or two files in them. But conversely, don't create folders with hundreds of files in them. Try to strike a balance. - Naming Conventions - avoid spaces in both folder and file names. Use underscores or hyphens to separate words. Use a consistent naming convention for all files. For example, if you are working with a river network, you might use the reach ID as the filename. If you are working with a raster dataset, you might use the variable name as the filename. Avoid using special characters in filenames. Use a consistent file extension for all files of the same type. For example, use
.tiffor all raster files. If you have multiple versions of a file, use a version number in the filename. For example,my_file_v1.tif,my_file_v2.tif. - Data Formats. Always use open, non-proprietary data formats. The Riverscapes Consortium strives to be FAIR. For tabular data, use CSV or TSV. For spatial data, use GeoPackages for vector data and GeoTIFF for rasters. For time series data, use CSV or TSV or SQLite.
- File Hygiene - Ensure there are no unnecessary or redundant files in your project folder structure. It's useful to keep log files and reports in the project. But delete any temporary files. This is particularly a problem for GIS data where software like ArcGIS and QGIS create lots of temporary files while layers are actively used in maps. Simply closing your desktop GIS software will often cause these "lock files" to be removed.
- Coordinate Reference System. Wherever possible, use a standard, well-known coordinate reference system. For a lot of data, this will be WGS84 EPSG 4326. For data that is specific to a region, use the appropriate UTM zone. There's no specific requirement for the coordinate reference system. Avoid unnecessary resampling of rasters. Rasters are best left in their original coordinate reference system.
Project.rs.xml
Fundamental to each project is the project.rs.xml file. This plain text XML file lists the data within the project located in the root of the project folder. It is used by the Riverscapes Data Exchange to understand the contents of the project and to display the project to users.
It's easiest to copy an existing project.rs.xml file and then modify it to suit your project type. You can start from scratch and use Intellisense in a powerful text editor like Visual Studio Code to learn and understand the structure of the XML file. Alternatively, if you have code that generates your projects, you can use the rsxml Python package to generate the XML file, which ensures that the output is valid.
For a complete reference of the XML structure, see the project.rs.xml V2 Reference.
If you are starting from an existing project.rs.xml file, be sure to REMOVE the warehouse XML tag near the top of the file. New projects should not possess a warehouse tag until they are uploaded to the Riverscapes Data Exchange.
The project.rs.xml file must be valid and the easiest way to ensure this is to write it using a powerful text editor such as Visual Studio Code that has XML validation built-in. Errors will be highlighted directly in the editor. Uploading a project with an invalid project.rs.xml file will result in an error.
Be sure to include a meaningful project name and a verbose, helpful description. And while no one likes writing metadata, it is vital for tracking data provenance and ensuring that your data is discoverable and reusable. Future you will be glad that you took the time to write good metadata.
Project Bounds
The project bounds should be set to the approximate, outermost geographic extent of the project. Use a desktop GIS to determine the outer extent of all the data in the project. Store the centroid and bounding rectangle in the project.rs.xml file, as described in the instructions.
Digitize a crude polygon around your data and then export it to GeoJSON and store this file in the root of your project folder. Reference this file in the project.rs.xml. Ensure that the GeoJSON is in WGS84 EPSG 4326. This step is extremely easy in QGIS.
Avoid complex concave hulls and polygons with too many vertices. A simple rectangle or polygon with only a handful of vertices is best. The final size must be under 200kb.
Business Logic
Business logic is used by Riverscapes Viewers to determine how to present the project contents to users. Each project type has its own business logic file.
Business logic files are stored in the RiverscapesXML repository. If you are developing a new project type then follow the instructions to develop new business logic.
A tip for developing business logic files is to start by saving the new business logic file directly inside your project folder. This is the first place that the Viewer looks for business logic files. This will allow you to test your business logic iteratively without having to upload your project to the Riverscapes Data Exchange.
When you have developed your business logic, you can submit a pull request to the RiverscapesXML repository for review by the Riverscapes Development team to review and approve. It is recommended that you do not upload any projects until your business logic is approved.
Symbology
The symbology used to display geospatial data in the Riverscapes Viewers is defined as a series of layer files that are also stored in the RiverscapesXML repository. Different symbology formats are used for each of the various versions of the Viewer:
| Riverscapes Viewer | File Format |
|---|---|
| Web | MapBox JSON |
| QGIS | QML Layer File |
| ArcGIS | .lyr Layer File |
| ArcPro | .lyrx Layer File |
Follow the symbology development instructions to develop new symbology files and then reference them in your business logic file. Note that symbology can be reused across project types, so you should review existing symbology and reuse it where possible.
Similar to developing business logic, the Viewer first looks for symbology files in the project folder. This allows you to test your symbology iteratively without having to upload your project to the Riverscapes Data Exchange in order to see the impacts as you refine your symbology.
Once your symbology is complete, submit a pull request to the RiverscapesXML repository for review by the Riverscapes Development team. It is recommended that you do not upload any projects until your symbology is approved.
Data Upload
You are finally ready to upload your data to the Riverscapes Data Exchange! If you have just one or two projects to upload, you can use the Upload feature within the QViewer for QGIS. Use the rscli command line interface if you have lots of projects to upload.
You will need to have an account on the Riverscapes Data Exchange to upload data. If you do not have an account, you can create one by visiting the exchange.
When you upload your project, you will need to provide an owner for the project. This can be an individual or an organization. Think carefully about this decision because it impacts who can edit the project in the future. You can always change the owner of a project later, but it is easier to get it right the first time.
You will also need to specify the privacy setting for the project. You can choose between public, private, and secret. Public projects are visible to everyone. Private projects are only visible to the owner. Secret projects are only visible to people who have access to the project, typically via membership of an organization.
Review
After uploading your project, you should review it in the Riverscapes Data Exchange. Both the QViewer upload feature and the rscli command line interface will provide you with a URL to view your project in the Riverscapes Data Exchange. Alternatively, you can simply navigate to the Riverscapes Data Exchange and search for your project.
Check the name, description and apply any tags that are relevant to your project. Check that the project bounds are correct and that the project is displaying as you expect in the Web Viewer.
Sharing
Once you are happy with your project, you can share it with the riverscapes community. Share the URL to your project details with your colleagues, collaborators, and anyone else who might be interested in your work. You can also share the URL on social media or in other online forums.
We encourage you to announce the new project on the Riverscapes community platform to let others know about your work.